Making costumes and accessories is a hobby of mine. I’ve been making stuff as long as I can remember. When I was really little I remember making stuff out of play dough and clay, and I always wanted art stuff for Christmas and birthdays. Over the years, I’ve learned how to work with more complex materials, such as thermoplastic and acrylic casting resin. No matter how many new materials I explore, many of them use the same basic techniques as making stuff out of play dough. Learning how to work with the material itself is usually the biggest challenge.
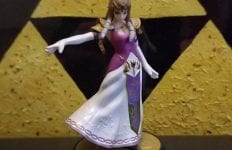
Let’s start with this tiara I made. It’s based off a design from The Legend Of Zelda video game series.
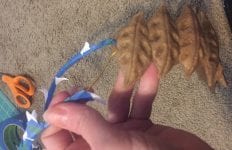
I started by drawing out a flat version of the front of the tiara, leaving a space for the large gemstone at the front. I traced my paper pattern on to thin craft foam (you can buy it at any craft store or fabric store… even Walmart has it.) To create a 3-D effect and add dimensions to it, I added more layers of thin foam to make the details stand out (See image 1 below). You can use hot glue on the foam, but only low temp or you run the risk of warping your foam shape, it melts very easily. The more recommended way to glue foam is with contact cement (you can buy at Walmart, Lowes, and any craft store.)
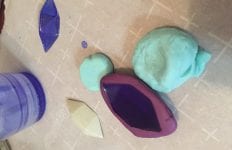
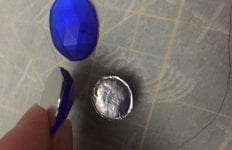
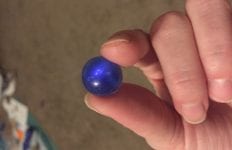
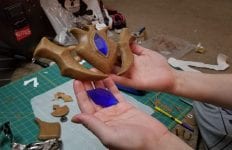
Since I could not find the right shape or color gemstones, I had to MAKE them. Image 2 shows two gemstones I sculpted out of clay (Apoxie sculpt, you can order from Amazon). Obviously these crude-looking clay gems are not see-through, but they don’t need to be, as I will be using them only to make a mold for casting the real gemstone that will go on the final piece. Once you have the desired size and shape to fit your tiara, remove the clay gem (See image 3 below).
It’s time to cover the foam tiara front with thermoplastic (only available online, Amazon has it). If you’ve never heard of this stuff before, it’s kind of like cake fondant when you heat it up, and it can be cut with scissors easily. When it’s cool or room temp, it’s hard like plastic. What’s great about it is, you can keep reheating it any time you need to work with it in its softened state. You can even recycle scraps of it by melting it together. Most people use a low temp heat gun, which gets much hotter than a hairdryer. If you don’t have one, a hairdryer will work, but it takes much longer to soften the plastic that way. It will stick to almost anything except your skin… and parchment paper. Make sure you line your work area with parchment, it’s also called baking paper, found in the baking section at Walmart, or anywhere that sells stuff for making candy. I covered my foam tiara on the front and back with thermoplastic to “sandwich” it, starting on one end, and slowly pressing it over the details in the foam carefully, avoiding air bubbles. If you get any air bubbles, you can poke a pin in it while it’s warm and soft to let the air out.
Once covered. trim off excess plastic with scissors. Heat up the seams and smooth out rough patches. I cut a V shape from the thermoplastic scraps and heated it onto the tiara to make a setting or “bezel” for the stone (See image 4 below). Lastly, I added the detail to the leaf-like parts of the tiara by pressing indentations with a wooden sculpting tool as I heated the thermoplastic (See the far right image, below).
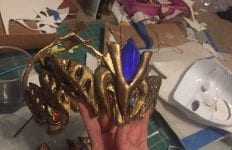
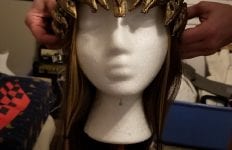
After the front of the tiara was completed, I made the back of the crown. Just like before, I had drawn it on paper, but instead of tracing on foam, I traced it on another layer of paper so I had two. It has this “crown of thorns” look to the back of it, as you’ll notice in the pictures below. I used a piece of wire between the paper patterns of the thorny backside, and wrapped it in tape, leaving the little thorny pieces sticking out. I heat shaped both the front and the back of the tiara into semi-circles, so that when joined they would form a circle. I re-heated the thermoplastic ends of the front of the tiara, and stuck the wire ends in to join the two pieces, then covered with more thermoplastic. I almost forgot about the design on the back, so I made it out of a separate piece of foam and covered it as well.
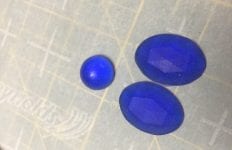
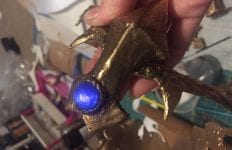
Remember that ugly gray gemstone I said we weren’t going to use in the final tiara? Here’s where that comes in! There’s this great stuff called Easy Mold Silicone putty (I bought mine from Amazon) that makes mold making simple. It’s a two-part silicone that you knead together like a dough, and press over the object you want to cast (See images below). Once your mold is fully cured, you now have a hollow shape in which you can pour clear acrylic resin inside to create a see-through gemstone! I added a few drops of blue resin dye for the color, you can buy it in various colors at most craft stores. I ordered acrylic casting resin from Amazon, Easy Cast brand, it’s a 2 part liquid that you mix. I won’t go into detail, but follow the instructions carefully or you will have sticky gems, or worse yet… air bubbles ugh!! The gems that come out are kind of dull at first. You need to put aluminum foil on the back, shiny side against the gem. I used clear mod podge to “glue” it, so it would be clear and not white like some glues, but you can use any clear glue. To make them shinier, paint an extra layer of acrylic resin over the top of the gem, and it will look glass-like.
I reused my tiara gem mold to make other gems for other accessories on my costume too (See image below, far left). To attach the gems, simply heat the thermoplastic, press the gem in, and heat a smaller piece around the edges to act as a stone setting. When you paint it, you should tape off the gems to keep them free of paint. I painted a few layers of clear mod podge over my crown to smooth out the texture, then used a black spray primer, then gold metallic spray paint. I used watered down black acrylic paint to darken in the crevices to give it an “aged metal” look. Once the paint is completely dry, I used a clear coat spray to seal the paint from being damaged, then peeled off the tape on the gems.
Below is the finished tiara, as well as the rest of the costume. The costume itself is actually just inspired off of Princess Zelda’s design, mashed up with Sailor Moon, so if you don’t recognize it from one of the games… that’s why! Hopefully, my DIY blog will inspire you to get crafty this Halloween!


